The Complete Beginner's Guide on How to Use a Commercial Coffee Roaster Machine
Share
If you’re passionate about great coffee and want to take control of the roasting process, learning how to use a commercial coffee roaster machine is the perfect starting point. Whether you're an aspiring artisan coffee roaster or a coffee enthusiast curious about the craft, this guide will walk you through everything you need to know to roast your beans with confidence.
Why Roast Your Coffee Beans?
A world of flavour and personalisation is available when you roast your coffee beans. By using your coffee roasting machine, you can control roast levels, freshness, and flavour profiles. Whether you're operating a café, running a small-batch roastery, or experimenting at home, mastering the roaster is key to creating memorable cups of coffee.
Understanding Coffee Roaster Equipment
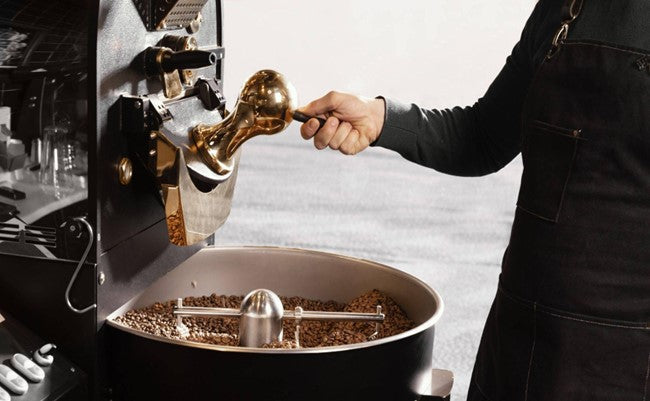
Before jumping into the roasting process, it’s important to understand the key components of coffee roaster equipment. Most commercial coffee bean roaster machines share the following parts:
- Drum or Fluid Bed Chamber: Where beans are roasted.
- Heat Source: Gas or electric-powered heating element.
- Cooling Tray: Cools beans quickly after roasting.
- Control Panel: Allows you to adjust temperature, time, and airflow.
-
Chaff Collector: Collects the outer skin that comes off during roasting.
Each roaster coffee machine may have its own interface and features, but the fundamental roasting process remains the same.
Choosing the Right Coffee Roaster Machine

Take your demands and roasting objectives into account while selecting a coffee maker. For beginners, Kaleido Coffee Roasters offers intuitive machines with precise control and artisan-grade results.
1. Commercial Coffee Roasters
Perfect for coffee shops and small-scale roasteries, these machines can handle large batch sizes and offer advanced profiling tools. They’re designed for consistency, scalability, and professional use.
2. Coffee Roaster Machine for Home
For home enthusiasts, compact roasters are available that mimic commercial capabilities. These are ideal for small batches, training, and learning the craft without the investment in large coffee roaster equipment.
Step-by-Step Guide to Using a Commercial Coffee Roaster
Step 1: Preheat Your Roaster
The preheated to the appropriate temperature, which is usually between 180°C and 200°C. A consistent preheat ensures even roasting throughout the batch.
Step 2: Load the Green Beans
Weigh out your green coffee beans and pour them into the hopper. Once the machine reaches the desired temperature, release the beans into the drum. Keep track of batch size – overloading can lead to uneven roasting.
Step 3: Monitor the Roast Profile
As the beans roast, monitor temperature, time, and airflow. Roasting typically happens in three phases:
- Drying Phase (3–5 mins): Moisture evaporates; beans turn yellow.
- Maillard Reaction (5–8 mins): Sugars and amino acids react; brown colour develops.
-
Development Phase (8–12 mins): Flavour and aroma develop; first crack occurs.
Most artisan coffee roaster setups use software to track these phases in real-time, helping refine and replicate roast profiles.
Step 4: Listen for the First Crack
Around 195°C, you’ll hear a cracking sound — this marks the start of the development phase. At this stage, flavours begin to deepen. Light roasts typically end shortly after the first crack, while medium and dark roasts continue longer.
Step 5: Cool the Beans Quickly
Once your desired roast level is reached, release the beans into the cooling tray. Airflow and stirring are necessary to quickly chill beans and stop them from growing further.
Step 6: Rest and Store the Beans
Allow the beans to rest for 12–48 hours to degas and fully develop flavour. Store them in an airtight, opaque container away from heat and moisture.
Tips for First-Time Roasters
- Start Small: Practice with small batches before roasting large quantities.
- Start Small: Practice with small batches before roasting large quantities.
- Use a Timer: To create dependable habits, keep track of each roast.
- Keep Notes: Record temperatures, times, and observations for each roast.
-
Experiment: Try different beans and roast levels to find your ideal profile.
Maintenance and Safety
Maintaining your coffee roaster equipment ensures longevity and quality output. Regularly clean the cooling tray, exhaust, and chaff collector to maintain optimal performance. Check for gas leaks (if applicable) and follow all safety protocols during operation.
Home Roasting vs. Commercial Roasting
While a coffee roaster machine for home is great for beginners, transitioning to commercial roasting requires attention to larger batch control, airflow management, and customer preferences. Machines from Kaleido offer an ideal blend of artisan control and scalability.
Why Choose Kaleido Coffee Roasters?
Roasting is a craft that we at Kaleido are enthusiastic about. Our machines are built for professionals and hobbyists alike, combining intuitive design with advanced controls to help you roast like an expert. Whether you're looking for a compact coffee bean roaster machine or a full-scale commercial setup, we’ve got the perfect fit for your needs.
Features of Kaleido Roasters:
- Precision temperature and airflow control
- High-quality drum construction
- Easy-to-use digital interface
- Compact models for home use
-
Durable and easy-to-clean build
Final Thoughts
Roasting coffee may seem intimidating at first, but with the right coffee roasting machine and a bit of practice, you’ll be crafting café-quality beans in no time. From selecting the right equipment to fine-tuning your roast profile, every step offers an opportunity to deepen your appreciation for the art and science of coffee.
Whether you’re starting a micro-roastery or learning how to use a coffee roaster machine at home, Kaleido Coffee Roasters is here to support your journey with innovative equipment and expert resources.
